Ultra-Flow Weir comb
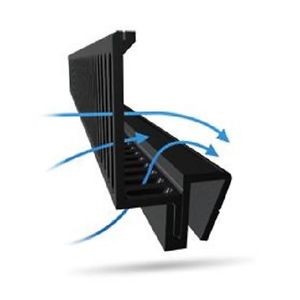
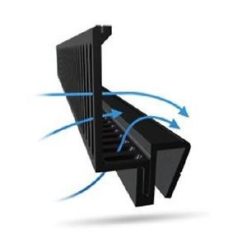
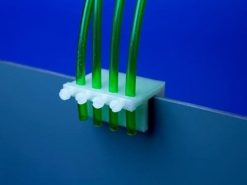
The D-D UltraFlow weir comb has been designed to drastically increase the amount of water that can pass through it by adding an extra grid to the underside of the comb thus increasing the surface area of the comb. This results in an increased flow through the comb of around 30-40% compared to a standard comb of the same length.
The comb can also be easily removed for cleaning and includes the ability to mount to various glass width’s of glass by means of a push fit or for very thick glass the runner can be cut to suit and bonded into place.
The UltraFlow weir comes supplied in two parts, the weir comb itself which push fits into the runner so it can be quickly removed for cleaning and the runner that can be either installed by pushing onto the weir glass (6-10mm glass) or by bonding the runner onto very thick weir glass (12mm +).
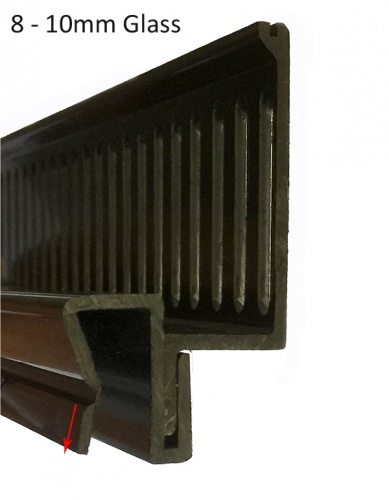
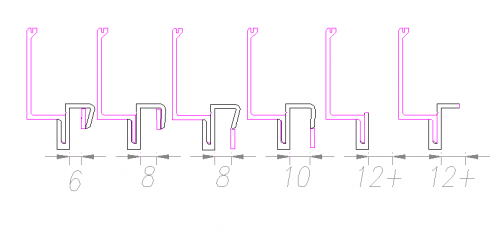
The image below illustrates how the multi-fit runner should be prepared to fit different thicknesses of glass. The runner includes a tab (highlighted in pink) that can bent into the correct shape to fit the appropriate thickness of glass (6-8mm). A guideline moulded into the runner will highlight where to make the bend. The tab is quite robust so it holds the runner into position so some force will be required to bend it into shape.
For 8-10mm glass the tab does not require bending and will sit against the back of the glass.
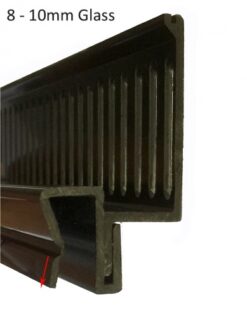
For 12mm glass or over the runner can be cut to shape and bonded directly to the glass, there are guides moulded into the runner to highlight where to cut. Scoring the line firmly with a sharp Stanley knife (watch your fingers) 4-5 times will allow you to cut through the runner at the score line as per the diagram for 12mm glass below.
If the runner is to be bonded onto a running aquarium we recommend using either Innotech or Gold seal Aquarium mastic as both will go off under water and are rubber based, Silicone sealant type mastics may not permanently bond to plastics and will not set under water. Bond the runner to the weir glass and allow to set, and then install the weir comb to complete installation.
If you wish to install the weir comb onto a box type weir the comb can be mitered as per the image below.
